Friday, July 31, 2009

Week 1+2: Organising & Preparing Food to Stocks, Soups and Sauces

Chef Jimmy Chiem and Yours Truly
.
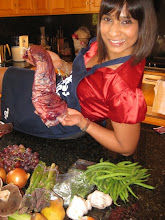
Donning my brand new clean, crisp chef whites – double breasted long sleeved coat, black and white checked pants and tightly wrapped waist apron, complete with neck-tie, hairnet and hat it would be an absolute understatement to say initially I felt out of my element. Like a little girl playing dress up, swimming in mummy’s oversized high-heeled shoes and lipstick smeared around her pout, I felt I too was drowning in what seemed to be a uniform that was way too baggy and loose (minus the clown makeup). Accustomed to fitting, ‘well-worn’ clothes, even with the XS chef whites, I still felt like a fashion disaster.

By the second day, things quickly moved beyond appearances. I am now the proud owner of my first very own chef’s tool box from King of Knives. The hardy steel case is similar in appearance to a carpenter’s toolbox (of course a lot flashier thanks to the metallic shine – not that I’m complaining!). The toolbox cost AU$ 240 and contains knives by Victorinox: Chef’s Knife, Boning Knife, Fish Filleting Knife, Paring Knife, Turning Knife, Palate Knife, as well as utensils: Carving Fork, Steel, Stone, Vegetable Peeler, Whisk, Wooden Ladle, Metal Handled Ladle with Rubber Spoon, Rubber Spatula, Plastic Scraper, Heavy Duty Serving Tongs, Digital Thermometer, Piping bag with 1 set star nozzles, 1 set plain nozzles and Pastry Brush.
.
The Full-Time TAFE Commercial Cookery Course which I am doing runs five days a week – 10.30 am to 6.30 pm, with a one hour break for lunch and to change into our chef whites. Two hours every morning is made up of theory classes, covering technicalities and forms the foundation for the hands on practical session that takes place in the afternoons. The first couple days comprised basic knife skills and the fundamentals and an introduction to organising and preparing food in general.
.
French Onion Soup with Cheese Croutes

Mid-week we had already plunged full force into stocks, soups and sauces. From grappling with proportions and ingredients of what make up a roux – the various kinds of ‘mother sauces’ it is used to form and the derivative sauces thereof, to definitions of what a moulis, chinois and mandolin are and how they are used in the kitchen.

Medium-Rare Beef Steak, Grilled Mushrooms, Bordelaise Sauce and Mushroom Sauce
.
While the theory tends to drag on a little, especially for food enthusiasts that know their gastronomy inside out – the practical classes bleat ahead with full force leaving little or no time to breathe, yet everyone, self included seem to be loving every minute!
.
So what have I learned that I didn’t already know?
.
.
- Always bend your knuckles, tucking your fingers safely below, thus guiding your knife in the right direction when chopping/ cutting. Ok I lied, I knew this, but never applied it, however I am learning my lesson after cutting the tip off my index finger on the first day of practical class and will hopefully adopt this method soon.

Pumpkin Puree Soup with Sippets, Julienne Carrots and Chopped Parsley


- Sippets are delicious miniature version of croutons fried in clarified butter. Once you pop you can’t stop.

Pommes Duchess
.

Potato Croquettes


- The best croquettes are made using a piping bag and allowing the mashed potato mixture to cool adequately (at least 20 minutes) before rolling in flour, egg-wash, breadcrumbs and deep frying (I tried this a month ago as hors d'oeuvre for a friends party, and although it did not completely flop, free-forming the shape by hand was not only a messy and arduous task, but yielded poor quality and visual unexciting croquettes. But, I will admit that a commercial deep fryer presents stiff competition.

- Mayonnaise whisked by hand replaces your quota of bicep curls for the week!

Poached Fish, Hollandaise Sauce, Crisped Skin and Turned Potatoes in Parsley Butter


- Hollandaise sauce is actually pretty easy and best prepared fresh. Goodbye to McCormick’s store bought modified starch preparation.

- Practice makes perfect. Even though I wasted god knows how many potatoes before turning a single decent potato, in the end the satisfaction of a job well done i.e. a barrel shaped potato is well worth ruining perfectly fine potatoes into mounds of useless vegetable scraps.

Carved Mash Melon boat, Musk Melon and Water Melon balls, Pineapple palm trees and Orange Segments with Sauce Anglais and Rasberry Coulis


- Oddly enough, carving fruit can be strangely satisfying and calming! And maybe I'll hone my skills in time!

Tuesday, July 28, 2009

Martini Ristorante


Martini Ristorante dishes up Southern Italian fare with a ‘modern Australian’ twist at Adelaide's northern suburb Norwood, at The Parade. Contrary to its name – apart from the classic Dry Martini and three other cocktails, it instead affords customers with an extensive range of wines to choose from. Martini has recently been in the news because Adelaidian contingent Andre, from the 2009 Top Ten Masterchef Australia television show, with his proud Italian background has carved a niche behind the scenes in their kitchen playing chefie.

Celebrating the lead up to a friend’s wedding (fellow gastronomy student, Jackie’s sister, Linda), our table of about 15 ladies kicked off the evening off with a round of sparkles – a refreshing 2005 blend of Yarra Burn Pinot Chardonnay, Meunier from Yarra Valley in neighbouring Victoria.

As I settled into my seat, arriving late, straight from my first day at cooking school with a cut to the top of my left index finger (I was a proud trooper with battle scars to show for it!), I was glad to be enveloped by the comfortable yet supportive wooden chairs, resting my weary feet and taking the edge of the long day with that much needed drink. Almost immediately I was offered the anti-pasti platter of Sardinian flat bread with char-grilled cacciatore sausage and goats curd with pepperonata, the house-special (simply, sweet roasted red and yellow bell peppers). While it made for a deliciously rustic appetiser, whetting the appetite with just the right amount of angst and curiosity, I could not help but wonder that perhaps both preparation and presentation was a little bit too ‘paysanne’ to qualify as suave-restaurant quality nibbles.

Following the simplicity of the flat bread anti-pasti platter, up next was olive oil and herb marinated Coriole olives and sliced field mushrooms served a la bruchetta style on sliced, toasted baguette. Taking it the next level was a mixture of what tasted and appeared to be a combination of scallop and crab meat, characteristically identified by the flaky, coarsely shredded white flesh dressed in a subtle piquant spice of chilli and lemon coated and served on a scallop half shell, with a bit of cream through it, topped with light breadcrumbs to created a crispy textured topping from a quick bake in the oven. The contrast in texture was a delight with a beautiful mouth-feel, my spoon cutting through a light, crunchy exterior that yielded a smooth a delicate creamy interior.

With three entrees down, it was time to sample the pasta on offer. First up was the Pappardelle con Anatra – flat, wide ribbon pasta served with a rich, velvety ragu of slow cooked duck and field mushrooms. At this point the table switched to a full bodied, South Australian drop – Coonawara’s Hollick 2004 blend of Cabernet, Merlot.


A lighter, fresh and somewhat unusual dish of pasta came next. It screamed spring with a super spunky, bright vibrant chlorophyll tinged pureed sauce coating generous strings of spaghetti, strewn peas finishing off the dish adding panache and variant delicate texture. I love how the peas exploded in the mouth exuding a subtle sweetness.

Last but not least, the Seared Tuna with Calamri Fritti – local salt and pepper squid, served with pear, rocket and parmesan salad and a lemon aioli was refreshing. The tuna cooked to perfection, pink on the inside, yet firm to the touch, with gorgeous grill marks scoring the top.


To end things in indulgent style, I opted for the tiramisu – an Italian classic served with a contemporary twist – on a bowl sized waffle providing a crisp, crunch that accompanied every bite of the decadent chocolate and liqueur infused cream and airy cake – it was absolute bliss.

The special dessert that evening was the bomba – banana and chocolate filled doughnut balls dusted with sugar, and these were popular with most of the ladies, undoubtedly it made for novel presentation, and was not too sweet. A bit of custard with the banana would have really given the doughnuts a lift and made the dish more impressive overall. If you’re going all out, you might as well in style the whole nine yards right!


Martini Ristorante on Urbanspoon

Monday, July 20, 2009

Wild Rosella Glazed Pork Chops with Baked Scalloped Emmenthal Potatoes


Wild Rosella is a tasty bush flower, indigenous to Australia and found in tropical Queensland. Similar in appearance to the hibiscus flower it has a rather tart flavour with characteristic notes of raspberry and plum. A truly rich antioxidant source it has incredibly high levels of the two most active anthocyanins and is believed to be a natural remedy for high blood pressure.

Outback Spirit, an Australian company manufactures Wild Rosella preserve which is perfectly suited for the glaze. Along with molasses and a splash of red wine vinegar it makes a robust marinade that mellows into a rich, beautiful sticky-sweet glaze when cooked, balanced by caramelised scallions that pack a contrasting piquancy, perfectly complimenting the pork chops. I relished the meal appropriately with a glass Santa Julia Malbec - a full bodied, yet soft wine with a cherry and plum aroma, from Mendoza, Argentina.

Other native Australian fruits include Pepper Berry – hailed as the world’s strongest antioxidant and polygodial rich, traditionally used as a bush medicine by indigenous Aboriginals. Illawarra Plum rivals the pepper berry for the title of strongest antioxidant being high in anthocyanins and Vitamin C. And the Kakadu Plumis is another favourite “health food” of the Aboriginal people, with the world record for the highest Vitamin C content and being a phytonutrient feast full of antioxidants such as folic acid, iron. If you live outside Australia, finding Wild Rosella will be extremely challenging, substitute with a raspberry or blackberry jam to recreate a similar flavour – it is sure to deliver a sweet-jammy flavour.


Serves 2
Prep Time: 15 minutes
Cooking Time: 30 minutes

Ingredients

For the potatoes:
3 medium-large potatoes, peeled and sliced; ½ cup milk; Olive Oil; 2 tsp dried Italian herbs; 100g Emmenthal, thinly sliced; Salt and pepper to season

For the pork:
100g Wild Rosella confit; 1 tsp molasses; 1 tsp red wine vinegar; 2 pork chops
2 scallions, finely sliced; Salt and Pepper to season; Olive Oil for frying


Method: Preheat oven at 200 degrees C. Fill two ramekins with 2-3 slices of potatoes, season with salt and pepper, herbs, place a slice of emmenthal and then repeat until full. Every 2-3 layers add a tiny dribble of milk. To finish drizzle with olive oil, cover the top of the ramekins with aluminium foil and pop into the oven for half an hour. The last ten minutes, remove the foil and allow the top to form a golden-brown crust.

In a bowl combine the wild rosella confit, molasses and red wine/ vinegar, set aside. Pat pork dry and sprinkle with ½ tsp salt and ¼ tsp pepper. Heat oil in a heavy skillet over moderately high heat until hot, but not smoking, then fry pork along with shallots, until pork is browned and shallots are golden brown and tender, about 5 minutes total on both sides, stirring shallots occasionally. Add the wild rosella mixture to the pork, reduce the heat to moderate and coat the meat evenly, cooking it until the liquid turns into thick syrup, about 2-4 minutes, turning over once, until pork is just cooked through. Transfer pork to a platter allowing it to rest for 5 minutes.

To serve, pour sauce over pork and scoop out the scalloped potato out of the ramekin onto the same plate.

___________________________
More pork recipes?

Sunday, July 19, 2009

With my Masters in Gastronomy in the bag, I say hello to Cooking School at TAFE, SA

July 2009 is proving to be an incredibly important month for me, marking two major milestones. The submission of my dissertation: Marketing South Australian Wine Tourism to High End Indians – a labour of sheer dedication and persistence that has been six months in the making, signals the completion of my Le Cordon Bleu, Masters of Gastronomy Programme. The paper argues South Australian wine tourism presents enormous potential for the affluent, “high end” Indian tourist market, which so far is an untapped niche. The crux of my arguments is based on the fact that high end Indians with aspirational and ostentatious characteristics, display clear consumption patterns including shopping, travelling, eating and drinking that make them an enticing economic prospect for the South Australian wine tourism market.

Following a thorough review of literature in the field of wine tourism, cross cultural and behavioural studies, marketing, principal concepts and approaches to studying wine tourism are developed in relation to “experience”, “lifestyle” and the development of “destination branding”. All of this is complemented by survey research I carried out at wineries in the McLaren Vale region of South Australia, which provided data to support my hypothesis. What I found was that current tourism sector lacks the appropriate development in the form of an internationally intensive, penetrating destination branding campaign supported by efficient infrastructure, activities on offer and bundling of attractions. Thus, my dissertation concludes by noting high end Indians belong to a category of “transnational” tourists, whose consumer behaviour tends to be based on their interests, tastes and social position (as opposed to ethnicity or race), making them representative of a new affluent class of gastro-tourists, making my dissertation all the more pertinent to the study of what is a burgeoning field of social activity.

As one door closes, another one opens. Tomorrow I begin my first day of what will be a year long journey at TAFE Regency Park’s cooking school, pursuing the Certificate III in Hospitality – Commercial Cookery Course. I am eager to hone my raw, barely existent culinary skills and develop my enormous passion for food by learning everything from scratch including basic kitchen safety and security, knife skills, how to work a pan like a professional, to preparing sauces, stocks, soups, appetisers, salads, poultry, meat, seafood, pastries, cakes and yeast goods.

As you can see through my recently documented cooking escapades, I have become immersed in the world of cooking be it simply following a reliable recipe, developing new techniques, utilising unfamiliar ingredients, reaching back to my roots for inspiration or experimenting wildly. This has been a conscious effort to build up my confidence in the kitchen and spur on a new dimension to my insatiable love for food. I hope this hands-on cooking school experience will not only bolster my writing giving it depth and dimension, but that it will also foster a whole rounded understanding of food giving me a paddock to plate perspective by inculcating culinary knowledge from a grassroots level. One thing is for sure, there will be many more culinary adventures to be had with cooking school snippets in the future... so stay tuned!

To balance all the extravagant eating I have been doing, the gym continues to be a religious daily routine. In fact the last two months I have been teaching Spin classes (a one hour intensive cardio group exercise workout on indoor bikes that simulates an outside cross-terrain ride, coordinated to music with structured tempo) at the University of Adelaide Gym on Monday and Wednesday evenings.

Saturday, July 18, 2009

Spinach and Roasted Red Bell Pepper Lasagna


When I think of Italian food, carne - the word for meat, immediately springs to mind and I am inundated with the images and flavour of spaghetti bologanise, meatballs, sausages infused with flat-leaf parsley, fennel and red wine, slow braised osso bucco and platters bursting with mortadella, soppressata, pastrami, prosciutto, pepperoni and bresaola carpaccio that leave me salivating and gasping for air.

About two years ago however, I learned this was not the case. While all of the afore mentioned are popular Italian favourites world-wide, the fare enjoyed by Italians on a daily basis revolves around simple, fresh vegetables and herbs strung together with homemade pasta, quality artisan cheeses and tomato sauce made from scratch. I used to teach English to two Italian kids from Turin and given my love for meat and misconception that copious amounts of beef and pork were part of the Italians daily regime, when I was invited over for dinner one night, I prepared myself for the ultimate meat fest. At first I was sadly disappointed by the obvious lack of carne, and then surprised by the simplicity of the meal. We began with slices of toasted baguette and a wonderfully characteristic hard, deep yellow cheese (the name I cannot remember) and a salad of quartered tomatoes doused in olive oil and stuffed with buffalo milk bocconcini. Then we moved on to the pasta course - a gigantic bowl of spaghetti simply tossed in olive oil and Parmesan cheese accompanied by another salad, this one a generously green and leafy with sliced red onions and a light olive oil vinaigrette. To finish a thin crust Margarita pizza smothered in golden-brown mozzarella followed suite.

This tricolour Spinach and Roasted Red Bell Pepper Lasagna is not only patriotically Italian but also captures their innate ability to take fresh, honest, simple ingredients and produce a rustic, sensual symphony for all the senses to savour. Flavoured with a generous handful of torn basil this dish is best bolstered with a glug of deep, bold red wine.


Ingredients

For the lasagna: 250 g dry lasagna sheets; 4 cups tomato sauce*; 250 g fresh spinach, stems removed, washed thoroughly; 225 g roasted red peppers; 110 g cream cheese; 1 ½ cups ricotta cheese; 3/4 cup Parmesan cheese, freshly grated; 1 egg; Salt & pepper; 225 g mozzarella cheese, thinly sliced or grated

*For the sauce: 2 tblsp of virgin olive oil; 1 cup onion, finely chopped; 1 tsp garlic, finely chopped;
handful basil leaves, torn; 4 cups canned tomatoes, coarsely chopped; Pinch of sugar; Salt and pepper to taste


Method: Preheat your oven to 170 degrees C. Bring a pot of water to boil, add blanch spinach (cook until slightly tender, for only about 2-4 minutes.) Drain, cool, and squeeze out excess moisture. Using a fork beat cream cheese until smooth, mix with ricotta, ½ cup grated Parmesan cheese and egg until well blended. Season with salt and pepper.

For the sauce, sauté onion and garlic in olive oil for 3-5 minutes. Add basil, tomatoes, sugar, salt and pepper. Bring to boil, reduce heat and simmer for 20 to 25 minutes. Taste for seasoning.

To assemble, spread a little tomato sauce on the bottom of your 9 x 13-inch baking pan. Cover with a layer of lasagna sheets making sure to overlap the edges a little. Add a little more sauce, some of the cheese mix, spinach, roasted peppers, and mozzarella. Add another layer of lasagna sheets and repeat until no filling ingredients remain. Reserve enough sauce, Parmesan cheese, and mozzarella for the top layer. Bake uncovered in the preheated oven for 25 minutes. Add a layer of aluminium foil and bake another 10 minutes. Remove lasagna from oven and let stand for 10 minutes before serving.
_______________________________
Looking for more veggie Italiano recipes? You might enjoy...

Friday, July 17, 2009

Moroccan Preserved Lemons


Traditionally preserved lemons are used in Moroccan Tagines - conical shaped earthen slow cookers used to braise lamb, infusing it with a wonderfully mellow characteristic citrus flavour. Today preserved lemons are being put to use as a flavouring for butter used on mashed potatoes, to season grilled fish or used in its concentrated full form to spice up sauteed greens, caramelised veggies and even as base for a lemony sorbet!

Super simple to make this home-made version is a cheaper and fresher alternative to store bought version. It takes minutes to make and lasts up to six months in your fridge and will definitely come in handy many a time. This recipe has been taken from culinaire guru David Lebovitz's blog living the Sweet life in Paris.


Ingredients: Lemons (8-10 are recommended to preserve and another 1-2 for juicing); Kosher/ sea salt; Optionally add a stick of cinnamon; couple of coriander seeds; bay leaf; dried chili
.

Method: Scrub the lemons with a vegetable brush and dry them off. Cut off the little rounded bit at the stem end if there's a hard little piece attached. From the other end of the lemon, make a large cut by slicing lengthwise downward, stopping about 1-inch from the bottom, then making another downward slice, so you've incised the lemon with an X shape.

Pack coarse salt into the lemon where you made the incisions. Don't be skimpy with the salt: use about 1 tbsp per lemon. Put the salt-filled lemons in a clean, large glass jar with a tight-fitting lid. Add the optional aromats if using. Press the lemons very firmly in the jar to get the juices flowing. Cover and let stand overnight. The next day do the same, pressing the lemons down, encouraging them to release more juice as they start to soften. Repeat for 2-3 days until the lemons are completely covered with liquid. If your lemons aren't too juicy, add more freshly-squeezed lemon juice until their submerged.

After three weeks to a month the preserved lemons should be soft, and then they are ready to use. Store the lemons in the refrigerator, where they'll keep for at least 6 months. Rinse before using to remove excess salt. To use, simply remove lemons from the liquid and rinse. Split in half and scrape out the pulp. Slice the lemon peels into thin strips or small dices, or squeeze the juice through a sieve to obtain highly concentrated, flavourful juice.

Thursday, July 16, 2009

Tarragon Cream and Almond Crusted Rack of Lamb with Gruyere Rosti Potatoes


Tarragon known as "little dragon" is derived from the French word estragon and the Latin word dracunculus. The dragon connection may have originated from the herbs fiery tang or from its serpent-like roots. Incidentally tarragon was also believed to cure the bites of snakes, serpents and other venomous creatures. It's delicate flavor predominant in French cuisine promotes appetite, complementing a wide range of poultry and is best used sparingly.

Paired with beautiful Australian lamb in this recipe, tarragon diffuses a warm, subtle flavor through the smooth cream, contrasted by the taste and texture of toasted, crunchy almonds, fresh, earthy young pea sprout shoots and crisp potato rosti cake infused with robust Swiss Gruyere cheese.


Serves 2-4

Ingredients

For the rack of lamb: 1 Australian rack of Lamb; 200g soft cream cheese/ sour cream; 100g fresh white breadcrumbs; 2 tbsp fresh tarragon; 15 ml milk; 50 g flaked almonds; 1 large onion, finely chopped; 50 g butter


For the rosti potatoes: 3 peeled large Yukon Gold potatoes, grated; 1 small onion, finely chopped; 1 egg; 115 g grated Gruyere cheese; ½ cup breadcrumbs; 2 tablespoons butter/ vegetable oil

Method: Combine grated potatoes, chopped onion, egg and grated Gruyere cheese, using the breadcrumbs to shape into round patties no higher than ½ inch high to ensure the potato cooks through and is crisp on the outside. Melt butter into a frying pan or heat together vegetable oil until hot, brown potato patties over high heat, about 3 - 4 minutes each side, until well browned on both sides. Remove from pan and set aside.

Pre-heat oven to 200 degrees C. In a bowl mix the cream cheese and breadcrumbs, 1 tbsp tarragon, 1 tbsp milk, salt and pepper to taste. Cut rack of lamb into three. Cover the bones with foil, put a good dollop of the cream mixture and spread evenly on top of each rack of lamb, press almond flakes on top. Bake in oven for 15 – 20 minutes if you like it rare or a little longer according to your preference. Stick potato rosti in the oven along with the lamb to warm through and crisp further.

Allow lamb to rest for 5-8 minutes, remove foil from lamb bones, serve atop a rosti potato patty with a dollop of sour cream and garnish with pea sprout shoots.

_________________________________
Looking for another lamb-tastic recipe?
Pesto Double Lamb Cutlets with Smoked Pumpkin Risone

Tuesday, July 14, 2009

Broccoli Soup with Lemon-Scallion Cream


This soup is an adapted recipe from Molly Wizenberg's blog Orangette, author of cookbook 'A Homemade Life'. The lemon-scallion cream punches up this classic comfort soup by adding a refreshing, exciting dimension and re-inventing what can be boring broccoli soup with an irresistible zesty flourish. Should you have any leftover sour cream mixture, it makes for a delicious dip along with potato chips or cucumber and carrot fingers.


Serves 4-6

Ingredients

For the soup: 1 tbsp unsalted butter; 1 tbsp olive oil; 1 small yellow onion, coarsely chopped; 2-3 cloves garlic, coarsely chopped; 800 g broccoli, both crowns and stems, trimmed and coarsely chopped; 5 cups chicken or vegetable stock; 1 rind (about 2 inches square) from a piece of Parmesan cheese; ¾ tsp. kosher salt, or less if your broth is well salted

For the sour cream:1 cup sour cream (not low-fat or nonfat); 2 scallions, white and pale green parts only, very thinly sliced; ¼ cup minced chives; 1 tsp grated lemon zest; 2 tbsp fresh lemon juice; ½ cup finely grated Parmesan cheese; ½ tsp kosher salt; ¼ tsp pressed or minced garlic

Method: In a small stockpot, warm the butter and oil over medium heat. Add the leeks and onion, and cook, stirring occasionally, until they have softened and the onion is translucent, about 10 minutes. Add the garlic, and cook for one minute. Add the broccoli, stock, Parmesan rind, and salt, and stir to mix. Bring to a boil, reduce to a simmer, and cook, partially covered, until the broccoli is tender, about 20 minutes.

While the soup cooks, prepare the cream. In a medium bowl, stir together the sour cream, scallions, chives, lemon zest, lemon juice, grated Parmesan, salt, and garlic, mixing until fully combined. Taste, and adjust as necessary.

To finish the soup, remove the Parmesan rind. Using a blender and working in small batches Рwhen pur̩eing hot liquids, never fill the blender more than one-third full Рpur̩e until very smooth. (Alternatively, pur̩e it in the pot with an immersion blender) Return the soup to the pot, add a few dollops of the cream mixture РI add about 1/3 cup Рand stir to incorporate. Taste for seasoning, and adjust as necessary. If needed, re-warm the soup gently over low heat. Serve the soup with a spoonful or two of the remaining cream on top.

_______________________________
Eager to warm up your winter?
Try Heston Blumenthal's Pea and Ham Soup
or Spiced Pumpkin Soup

Monday, July 13, 2009

Oreo Cheesecake


My first encounter with deliciously naughty Oreo Cheesecake was at Spiga, a beloved Bangalore al-fresco resto-cafe that closed down about two years ago. Since then the owners have opened a resto-lounge - Couch, aiming for a retro-chic club atmosphere, showcasing a few old favourites, but the simplistic, hit-the-spot dishes like the infamous House Salad, Lemon Fish, Herb Crusted Rack of Lamb and Oreo Cheesecake seem to have sadly disappeared forevermore.

The inspiration for re-creating this classic Spiga dessert is my boyfriend a.k.a personal trainer and incredible hulk, Sameer. For us Sundays mean skype dates (the modern preserve of long distance relationships) and for Sameer it signals the end of a long week - a "cheat day" from his rigorous health regime, legitimising an entire day of sin - gorging on pints of Baskin Robbins Pralines and Cream, Pepperoni Pizza and Quarter Pound Buttery Beef Steaks! About two months ago in between one of our skype dates I caught him scoffing not one, two or even three, but an entire sleeve of Oreo cookies discreetly! And when I, the appalled food snob confronted him, he claimed they were meat cutlets! While I am never going to let him live that one done, this dessert is a super simple treat that will disappear in no time!


Ingredients: 1 pack Oreo biscuits (12-14 pieces or 150g); 70g butter; 100g caster sugar; 250g softened cream cheese; 120ml whipping cream; 50ml UHT full cream milk; 1 tblsp Gelatine

Method: Prepare a loose bottom or spring form round cake tin. Wrap the loose base of the tin with aluminium for easy removal of cake later. Separate the oreo biscuits’ cream into a bowl. To make the base, crush 10 pcs Oreo biscuits till fine, a blender will ensure its fine. Add in the softened butter to the crushed biscuits and mix well. Spread the crumbs evenly onto the prepared cake tin. Press firmly over the base and refrigerate it at least for about 30 mins or chill it until firm.

Meanwhile, beat the softened cream cheese with castor sugar till creamy and pale. Add in whipping cream and the oreo biscuits cream (separated from the biscuits) and mix well. Heat up the full cream milk and gelatin in a pot. Keep stirring till it boils and make sure the gelatin is dissolved. Then set aside to let it cool down for a minute or two, until about 60 C degrees. After that, pour the gelatin mixture into cheese filling and mix well. Crush/break the remaining 2 pcs of Oreo biscuits into chunks. Fold in the crushed biscuits into the cheese filling. Pour the cheese filling over the chilled biscuit base and chill it over night or chill it until firm.

Sunday, July 12, 2009

Squid Ink Pasta with Garlic Cream Sauce, Prawns and Squid Legs


Arriving in Adelaide over a year and a half ago two culinary, or rather restaurant trends that were, (still are to some extent) all the rage caught my eye inciting curiosity. The first – crispy fried zucchini flowers stuffed with soft goat’s cheese, (I have to admit I have not yet tried) and the second – marvellous strands of black tagliatelle, punctuating large white serving plates with a unique, almost unearthly beauty.

Squid ink pasta claims to be slightly sweeter than regular pasta, personally speaking apart from the distinctive colour there is no distinguishing taste or texture tells them apart from the regular durum wheat varieties – hardly surprising as they are made from durum wheat, semolina, squid ink (which gives it the black colour) and water. You can find squid ink pasta at any good delicatessen; I like Lucia’s and Atlas at Adelaide’s Central Market that sells a 250 g pack for $5.

Presenting beautifully, perfect for a sit-down dinner, this recipe has been inspired from a miscellaneous internet recipe. Simple, yet elegant flavours – garlic, basil, nutmeg and white wine complement the squid ink pasta, prawns and squid legs without stealing the show.


Serves 2
.
Ingredients: 250 g Squid Ink Pasta: 2 tsps butter; 4 cloves garlic, minced; 1 shallot, minced; 1/4 cup dry white wine; 1/4 cup chicken broth; 1/2 cup heavy cream; 1/2 tsp Nutmeg, freshly grated to taste; 1 tsp fresh lemon juice; Salt and pepper, to taste; 12 Prawns, de-veined, tails intact and butter-flied; 200 g Squid legs, skin removed; Parmesan, finely grated; Pea shoot sprouts, to garnish; Fresh Basil leaves, to garnish; Extra virgin olive oil, to fry; Dried Italian herbs
.

Method: In a skillet over medium high heat melt butter, sauté garlic and shallots for 2 minutes; add white wine; simmer until reduced by one half. Add broth and cream, lower the temperature and simmer until thickened. Remove from heat; add nutmeg, lemon juice, salt and pepper. Set aside.

Bring a pot of salted water to the boil and cook the squid ink pasta for 10-12 minutes or according to packaged recommendations, making sure not to overcook the pasta. It should be al-dente.

While the pasta boils season a hot grill pan with extra virgin oil, dried Italian herbs, pepper and salt. Sear the prawns for a minute on either side, remove from the pan. Char-grill the squid legs on the same pan, refreshing oil and herbs if required. Do not fry the squid for longer than 3-4 minutes as it will get tough and rubbery. Once cooked through and slightly coloured, set aside with prawns.

Once the pasta has been boiled, drain it and add it to the re-heated white wine sauce. Combine the prawns and the squid legs as well, coating it with sauce. It requires only a minute or two to heat through.

To serve, spoon sauce onto serving plates, twirl the squid ink strands around a long-tined fork, slide off onto the sauced plates. To finish, add the prawns and the squid legs on top and garnish with the pea shoot sprouts, basil leaves and Parmesan.
____________________________
Love Prawns? Prawn Saganaki
Eager about eight legged creatures? Try Greek Grilled Octopus
Or looking for more seafood pasta recipes? Linguine alle Vongole

Friday, July 10, 2009

While India's Monsoon Brings Marvellous Mangoes, Bhujia and Namkeen Remain Faithful Snacks All-Year Round


April showers inaugurate India’s annual monsoon that lasts roughly three months. While the relentless downpour drowns most of the country’s metropolitan cities due to inferior infrastructure, agricultural areas benefit immensely. Although India is famed as the rice bowl of the world – the biggest exporter of the grain, the seasonal mango, the ‘king of fruit’ is far more prized and precious. India’s monsoon yields three months of plump, delicious, sweet-as-honey and smooth-as-custard mangoes, unparalleled to anything you have ever tasted.

Come April, the Indian subcontinent celebrates – mango madness abounds, it is almost infectious. It is at this time of year that I most long to be back home in Bangalore, buying Alphonso, Kesar, Dussheri or a Khajri (varieties of Indian mangoes), carefully burying them in cardboard boxes filled with straw in a dark corner of the pantry (this helps ripen them completely) and excitedly waking every morning, racing to their hidden place in the pantry to feel whether the skins had softened enough, indicating their readiness.

In India, the preferable, and perhaps the best way of truly relishing a mango to its full potential is simply by slurping the ripe buttery flesh through a slit cut at the top of the mango skin. Author Sona Pai in Mangoes, Motorcycles – and Memories, describes childhood memories of the same. Pai’s divulges her foodways as a first generation Indian-American, portraying the mango as central to Indian culture and cuisine – rightly so, and how the 18 year ban on Indian mangoes to the USA affected her, as did the recent lift of the ban, and the sudden prospect of the impending food miles.

If you have never tasted an Indian mango you are probably wondering what all the fuss is about. Madhur Jaffrey, possibly India’s greatest culinary authority to the world sums up Mexican mangoes aptly - “pleasantly hued, but lifeless rocks.” Caribbean, Latin American, Florida, California and Hawaiian mangoes were originally planted by Portuguese colonists, bred with more fibre to ensure a shelf-stable structure that unfortunately resulted in mangoes with the a “texture of a wool sweater” as Pai accurately describes them.

While I have not come by Indian mangoes here in Australia yet, bhujia and namkeen – popular Indian snacks seem to be rampant, increasingly sold and consumed. In fact, recently an Aussie friend of Vietnamese origin brought me some cornflakes bhujia to try!

Typically a combination of sweet and savoury at the same time, bhujia comes in a variety of refreshments available as diverse as the country itself and are traditionally relished with a cup of hot Indian tea in the company of friends and family. Today the snack has become ubiquitous with pre-dinner drinks, offered alongside salted peanuts with cold beers, cocktails and whiskies.
Each region of India has its typical and local specialty of namkeen, the common feature is they are all usually spicy, easily available, and inexpensive.

Also referred to as “mixture” it can contain anything from gram, lentils, gram flour, rice flakes, peanuts, potato chips, spinach extract, cornflakes, potato sticks, cashew nuts, raisins, turmeric, ground spices, sugar salt, spices and lemon. I have seen bhujia stocked at select Foodland and Woolworth outlets (labelled as made from imported ingredients, assembled in Australia) at around $5-8 for a 250g box, although I assume the imported varieties that Indian grocers sell at a cheaper rate are more “authentic”.

Thursday, July 9, 2009

Roast Venison Blade, Quince Chutney and Red Wine Sauce


This is an adapted recipe by Mark Hix, from The Independent, Lifestyle and Food, UK. “Venison is a general term for red deer, roe deer, fallow deer and so on. Good restaurants, and butchers for that matter, should give their customers this kind of information, moreover where it's from. Otherwise it's like describing meat just as beef or lamb.” The saddle – the part that lies between the top of the hind legs and first ribs (comes with a bone) or rolled shoulder or blade is the recommended cut of venison for this recipe if you enjoy medium-rare doneness.

The haunches, similarly, unless broken down into specific muscles, is said to be on the tough side and don't lend themselves to medium-rare roasting. Butchers can cut the haunches into smaller cuts, equivalent to beef topside that can be roasted medium-rare and are easier to carve than the saddle, weighing about 500g so they won't serve as many people as a saddle, but they're pure meat, with no bone, unlike the saddle.

I used a blade of farmed venison from Hahndorf, a Germanic settlement east of Adelaide. Gamey flavours are commonly paired with juniper berries – a fruit from the evergreen tree that imparts a distinctive sweet-sharp taste whether dried or ripe, melding especially beautifully with the sauce in this recipe. The roast is best served alongside root vegetables. I recommend my Warm Beetroot, Sweet Potato and Caramelised Onion Salad with Garlic-Lemon Olive Oil Dressing.

Note: if your roast comes with a net holding it together, do not snip it off before roasting. Your butcher has rolled the shoulder of meat and held it together with the net so it is easier to roast, assisting in an even cooking, setting it into a presentable "shape and also makes it easier to carve.


Serves 6-8
Cooking time: 1 hour 20 mins

Ingredients: 1 saddle of venison, (1 kg); 2 onions, peeled and roughly chopped; 1 carrots, peeled and roughly chopped; 1 stick of celery; 2-3 sprigs rosemary; 5 juniper berries; A good knob of butter, softened; ½ tbsp flour; 25 - 50 ml red wine; 500 ml beef stock; Salt and freshly ground black pepper

For the quince chutney: 1 quince, peeled, quartered and the core removed; 40g granulated sugar; 3 juniper berries; Pinch of Cinnamon; Pinch of freshly grated Nutmeg

Method: Put the quince in a pan with the sugar, spices and juniper berries and cover with water. Bring to the boil and simmer for about 45 minutes or until soft and mashable. Drain in a colander and mash coarsely with a potato masher or in a food processor and transfer to a serving bowl.

Pre-heat the oven to 220ºC. Rub the blade with butter and season. Scatter the onion, carrots and celery in a roasting tray and lay the venison on top. Roast the saddle for 35-45 minutes for medium-rare and another 10-15 minutes for medium to medium well done. Any longer and it will end up dry.

Remove the venison from the roasting tray and keep warm in a very low oven, but don't let it cook any more. Put the roasting tray with the vegetables on a medium heat on top of the stove. Add the rosemary, juniper berries and flour and stir well. Gradually add the red wine and hot stock, stirring to avoid lumps forming and bring to the boil. Simmer for a few minutes then transfer to a saucepan, scraping the bottom of the tray to remove any residue from the venison. Simmer for 10-15 minutes or until thickened then strain through a fine meshed sieve.

Make sure you allow the roast to rest on a wooden chopping board, for about 10- 15 minutes before carving it, especially if serving medium-rare as it allows the blood to drain, if any.
To serve, carefully with a flexible sharp knife carve fillets into ½ to 1 cm slices on the bias and arrange on plates, with either a little red wine sauce poured over and a spoon of quince chutney on the side. If you prefer offer the red wine sauce in a gravy bowl and the quince chutney separately.

Wednesday, July 8, 2009

Roasted Beetroot, Sweet Potato and Caramelised Onion Salad


This is a wonderfully warm salad and a sure-fire winter treat served simply on its own straight from the oven, or sprinkle a handful of baby spinach on top if you like. The earthy flavours of the beetroot, caramelised onions and sweet potato also provide the perfect compliment alongside a hearty slow braise or roast. I especially love leaving the skins on the sweet potato, it infuses a gorgeous mellow sweet flavour reminiscent of rose hips.


Serves 4
Cooking time: 1 hour 20 mins

Ingredients:1 bunch medium sized beetroots (600g), trimmed; 1 medium sized (400g) purple sweet potato, leave skin on, cut into 2 cm wedges; 4-5 red onions, peeled and sliced into long arcs; 50 mls olive oil; 3-4 stems fresh rosemary, spindles removed; 1 tblsp sea salt; Freshly ground black pepper; ½ cup toasted walnuts; Garlic-Lemon Olive Oil Salad Dressing (click link for recipe)


Method: Preheat oven to 180°C. Wrap beetroots individually in foil. Place on a baking tray and bake for 1 hour 20 minutes or until tender. On a separate tray place sweet potato, onions and garlic bulbs, drizzle with olive oil and season well with salt and pepper. Scatter over rosemary, cover with foil and place in oven along with beetroots for an hour or until soft. (Beetroot can be tested with a skewer, cooked when soft in the middle)

Remove the foil and peel off the skin of the beetroots. The skin slips off easily when hot, just work quickly to avoid burning your fingers. Slice each beetroot into quarters and then halve those quarters so they aren’t too big. Allow the vegetables to cool for about 5 – 8 mins. To serve scatter a platter with the caramelised onions, and then place sweet potato and beetroot slices on top, alternating them. Finally top with the toasted walnuts and drizzle with the garlic-lemon olive oil dressing.

Garlic-Lemon Olive Oil Salad Dressing


A light dressing perfect for roast veggies or a lucious garden salad.

Ingredients: 2 bulb garlic, roasted for 25 mins in a hot oven; 100 ml olive oil; 1 tsp Dijon Mustard; Juice of 1 lemon; Drizzle of honey; 1 tblsp hot water

Method: Remove garlic from the oven. Allow to cool and cut off base with a sharp knife. Flesh can then be removed by squashing the garlic with a knife from the top. Place flesh in a food processor with ½ tsp of salt, honey and mustard. Blend until smooth. Slowly add olive oil with motor running, until thick. Remove to a small bowl and stir in hot water, lemon juice and pepper to taste.

Tuesday, July 7, 2009

Bobby Flay's Eggplant Parmesan

This delicious comfort classic hits the spot every time. The homemade sauce is well worth the effort, (absolutely finger-lickin' good!) so really take the extra 15 mins and do it yourself and you will tell a big difference from the store bought sauce-in-a-jar.

The beauty of this dish is that the deep-fried, crumbed eggplant slices do not get soggy from tomato sauce placed on top, and is stays just as fresh and just as delicious the next day (if you have leftovers).


Prep time: 30 min
Cooking time: 1 hr
Serves 3 - 4 people

Ingredients

Homemade Tomato Sauce: 3 tblsp olive oil; 1 large yellow onion, coarsely chopped; 3 cloves garlic, coarsely chopped; ½ tsp red pepper flakes; 1 can plum tomatoes and their juices, crushed with your hands; 1 can crushed tomatoes; ½ glass red wine (cabernet sauvignon or shiraz works well); 3 tblsp freshly chopped flat-leaf parsley; 3 tblsp freshly chopped basil leaves; 1 tblsp freshly chopped oregano leaves; Salt and freshly ground black pepper

Eggplant: 5 cups fresh dried breadcrumbs (made from dried day-old bread); Butter, for greasing the dish; 3 tblsp finely chopped fresh flat-leaf parsley; 1 tblsp finely chopped fresh oregano leaves; 1 tblsp finely chopped fresh thyme leaves; Salt and freshly ground black pepper; 2 large eggs, beaten; 2 tblsp water; 2 medium eggplants, cut into 1/2-inch-thick long slices (need about 18 slices); All-purpose flour, for dredging; Vegetable oil, for frying; HomemadeTomato Sauce; 125 g grated fresh mozzarella, plus 100 g fresh mozzarella, thinly sliced; 3/4 cup grated Parmesan; Fresh basil leaves, torn


Method: Heat the oil in a large Dutch oven over medium-high heat. Add the onion and cook until soft. Add the garlic and red pepper flakes and cook for 1 minute. Add the tomatoes, bring to a boil and cook, stirring occasionally, until thickened, about 25 to 30 minutes. Transfer the mixture to a food processor and process until smooth. Return the mixture back to the pot, add the parsley, basil and oregano and season with salt and pepper. Cook for 10 mins longer and season with honey, if needed.

To dry out the bread crumbs: Preheat the oven to 300 degree F. Evenly spread the bread crumbs on a large baking sheet and place in the oven. Bake for 5 mins, turn the oven off and let the bread crumbs sit in the oven for 30 mins or until just dry.

Raise the temperature of the oven up to 400 degrees F. Lightly butter the bottom and sides of a 15 by 10 by 2-inch baking dish and set aside. Place the bread crumbs into a large shallow bowl. Add the herbs, 1 1/2 tsp salt and 1/2 teaspoon of pepper. In another medium shallow bowl, whisk the eggs and 2 tblsp of water together. Season each eggplant slice on both sides with salt and pepper. Dredge each eggplant slice in the flour, tapping off excess, then dip it in the egg, and finally dredge it in the bread crumb mixture. Shake off any excess breading and transfer the egg plant to a baking sheet. Repeat with the remaining eggplant.


Heat ½ inch of oil in 2 large straight-sided sauté pans over medium heat until the oil reaches a temperature of 385 degrees F. Working in small batches, fry a few of the eggplant slices, turning once, until golden brown, about 3 minutes per batch. Using tongs, transfer to a paper towel-lined baking sheet. Repeat with the remaining eggplant.


Cover the bottom of the prepared baking dish with some of the tomato sauce and arrange half of the eggplant over the sauce. Cover the eggplant with some of the sauce, grated mozzarella and some of the basil. Repeat to make 3 layers ending with the sauce. Top with the fresh mozzarella and remaining Romano.

Bake for about 30 mins or until just beginning to brown. Allow to rest for about 10 mins before serving.

_______________________________
If you liked this recipe, you may also like a variation of the same:
Eggplant Parmigano Parcles - a twist by Chef Simon Bryant